
Creating your first very simple OData SAP Gateway Service
There is so much information and seemingly new technologies available about developing mobile and responsive applications within SAP at the moment it makes it very difficult to know
where to start. So Fiori is the future along with SAPUI5, what about the SAP Gateway and OData, or even HANA,
Ariba(or whatever it is called) and the endless other names and technologies around..... How do these all fit into the big picture for an SAP developer?
Well let's start at the ground level i.e. the Netweaver Gateway where traditional SAP ABAP skills are required as part of building a Fiori app.
The SAP Gateway has actually been around for many years but with the move to Fiori/Mobile/Responsive apps it is being used more and more and is now a key part of your SAP landscape.
The Gateway allows data within your SAP system(s) to be accessed by the outside world via OData services.
...So in this new Fiori world the front end is created using SAPUI5 using the Web IDE,
...this calls an OData service that has been created on your SAP system via the SAP Gateway
...the OData service uses ABAP to retrieve SAP data and returns it via the OData service
The example below will show you how to quickly create your first OData Gateway service using basic ABAP code to select data from a standard table.
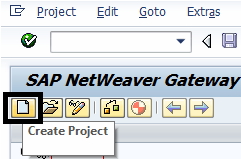
Step 1 - SAP Netweaver Gateway Service Builder
First go to transaction SEGW where you will be able to build your service

Step 2 - Create project
Next using the create button you have to create a project to store all your data models, implementtions, entity types, entity sets etc. Don't
worry too much about the terminology at this stage, all will become clear.
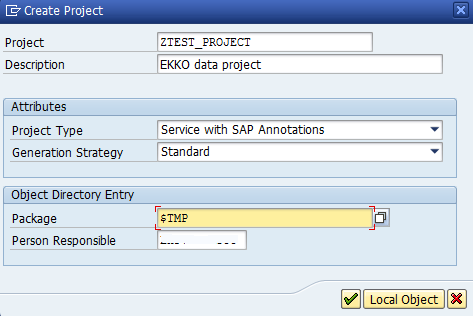
Step 3 - Enter project details
Enter a name, description and package. Leave everything else as default unless you know you need something specific.
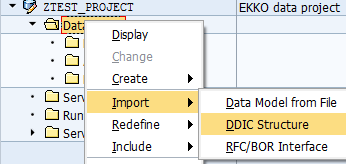
Step 4 - Import DDIC structure
We are going to base this example on a subset of the standard SAP table EKKO. Within the newly created project,
right click on the "Data Model" node and select Import->DDIC Structure
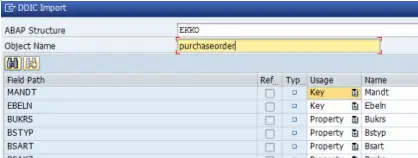
Step 5 - Enter structure details
Enter EKKO within the ABAP structure field and enter an object a name i.e. purchaseorder
Step 6 - View Properties
Expand the newly created node "Entity Type->purchaseorder" and double click the Properties node
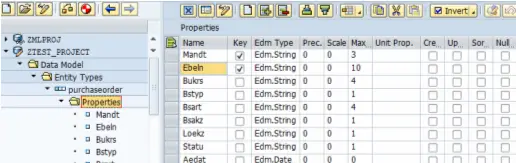
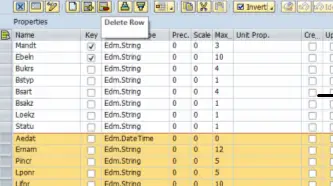
We are just going to use the top few fields so select all the fields below Statu and delete them
Until it looks like this
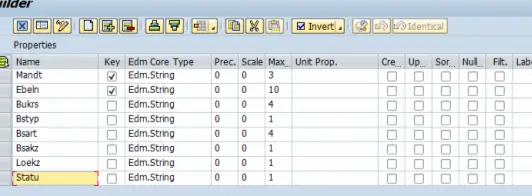
Note: The reason I'm not going to use all the fields is because some are incompatible with a gateway service without changing the data type.
I will show you where you would get the error further down if you had used all the fields. This info might just help you understand the error
quicker when you are creating one for real in the future.
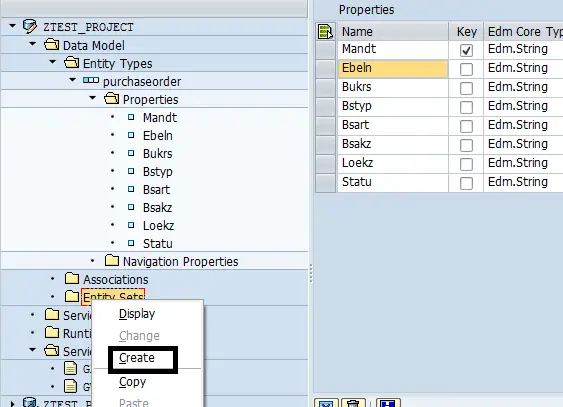
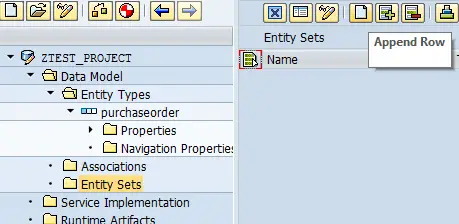
Step 7 - Create Entity Set
Save your process so far and then right click on the Entity Set node and select Create
Step 8 - Alternate way to create Entity Set
Alternatively double click the Entity Set node and then click the Append Row button
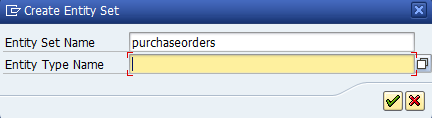
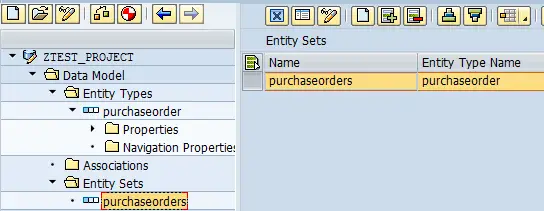
Step 9 - Entity set details
Give the entity set name (usually a plural of the Entity Type)
Then select the Entity Type from selection input help
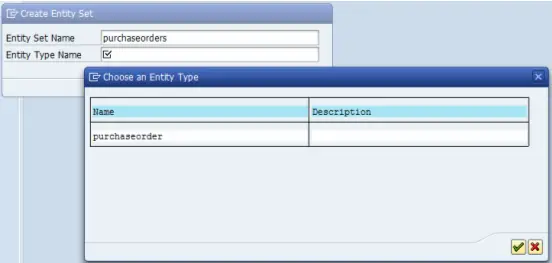
Once selected press ok (green tick)
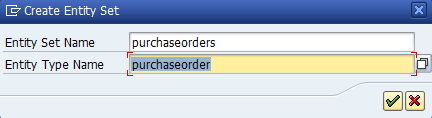
Entity set has now been created
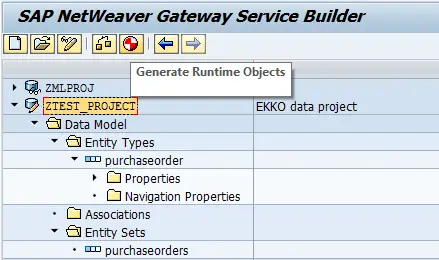
Step 10 - Generate gateway service
First double click the project node and generate the whole project using the "Generate Runtime Objects" button
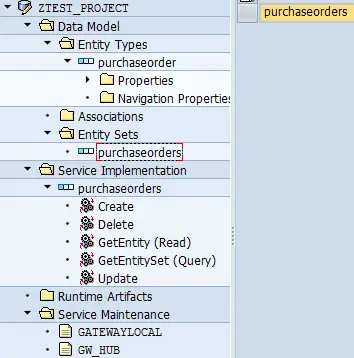
You will now notice that Service Implementation Objects have been created.
Create, Delete, GetEntity(Read), GetEntitySet(Query) and Update
Step 11 - Active and maintain service
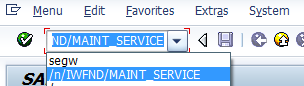
Now you need to go to transaction "/IWFND/MAINT_SERVICE" I always find I can only get this working if i
add /n at the start i.e. /n/IWFND/MAINT_SERVICE
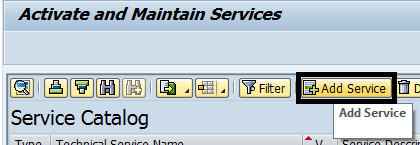
Step 12 - Add service
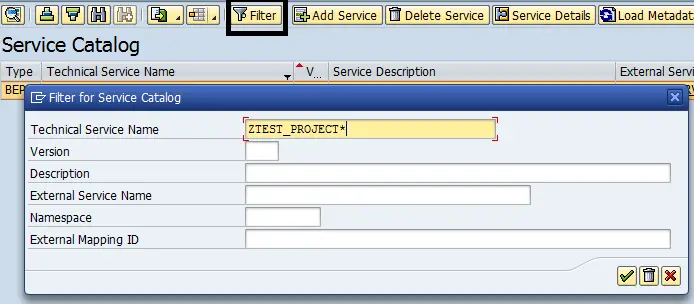
Within /n/IWFND/MAINT_SERVICE click the Add Service button
Then enter the information of the service you want to add (Notice you can use wildcards at this point to find your service)
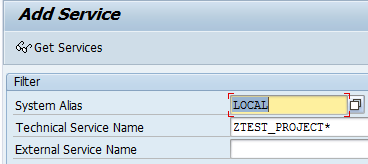
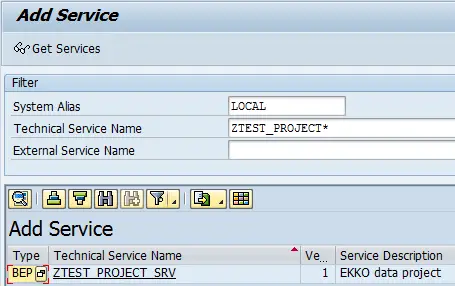
Press enter to find your service or services that match your search criteria. Once it does click on the one you want to add
The next screen shows you the selected service details, enter package details(i.e. local Object) and leave everything as default. Then press the ok button (green tick)
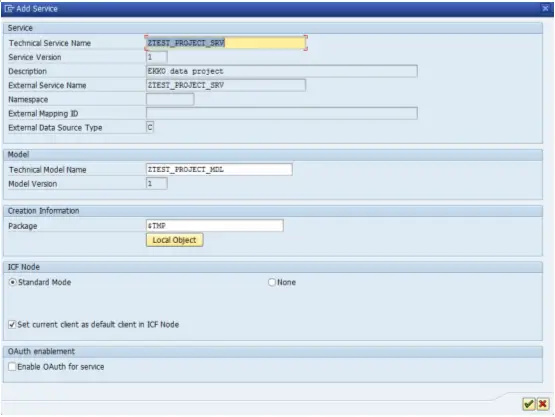
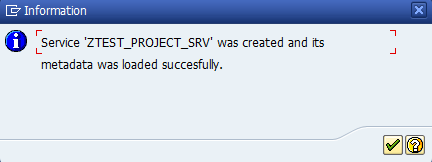
You should now recieve a message popup that your service "was created and it's metadata was loaded succesfully"
Return to previous page

Step 13 - Find your added service
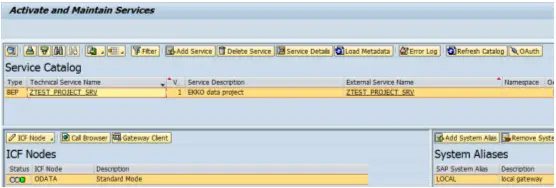
You will now be returned to the service catalog, depending on how many services you have setup in your system you may need to use the filter
functionality to find your newly added service.
You should now see the service setup details and a green traffic light next to the ODATA ICF node in the bottom left hand corner.
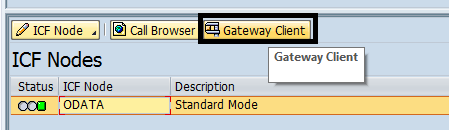
Step 14 - SAP Netweaver Gateway Client
We now need to test it using the SAP Netweaver Gateway Client, which is accessed via the "Gateway Client" button just above the ODATA node in the bottom left hand corner
Then, leaving the Request URI as default "/sap/opu/odata/sap/ZTEST_PROJECT_SRV/?$format=xml" simply click the "Execute" button
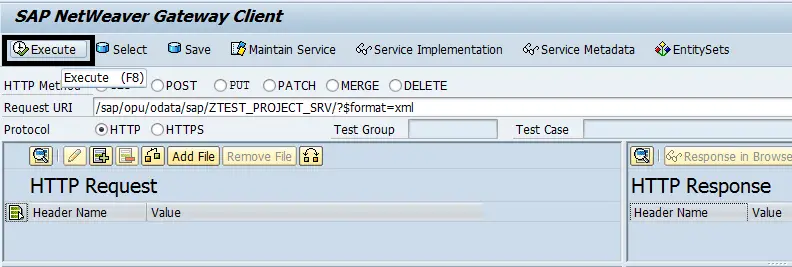
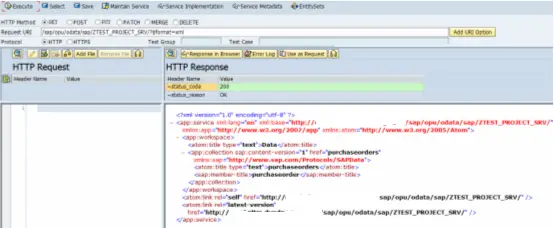
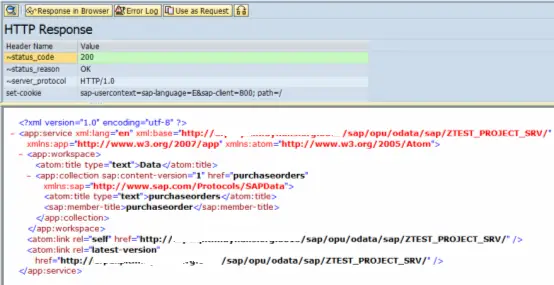
You should then get a HTTP respose similar to this with a green status_code
Step 15 - Further tests via SAP Netweaver Gateway Client
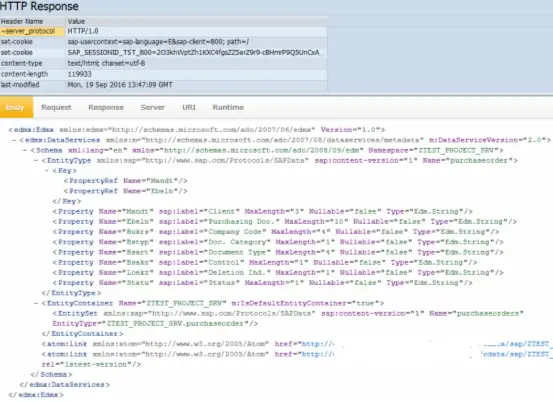
Now you can modify the URL so that it ends with "$metadata?sap-ds-debug=true" and then press execute again,
so that we can return metadata properties of the purchaseorder entity

"/sap/opu/odata/sap/ZTEST_PROJECT_SRV/$metadata?sap-ds-debug=true"
Now change the URI to have "/purchaseorders?sap-ds-debug=true" at the end so that we can target the data of the
entity set purchaseorders
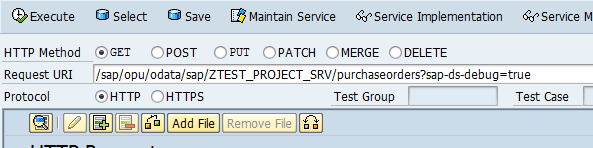
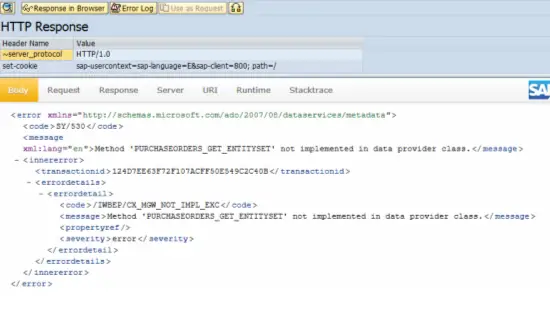
When you press execute you should get the following error as we have not implemented the method that populates this data yet
Step 16 - Implement GetEntitySet method
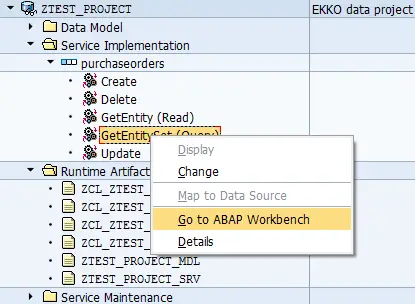
Now return to the SEGW transaction and find the service implementation methods created before. Find the one called GetEntitySet(Query) and right click on it. Then select "Go to ABAP Workbench"
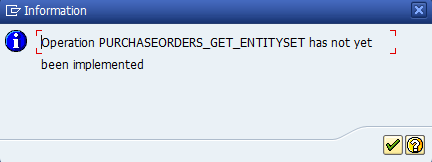
The following message will appear saying operation has not yet been implemented. Simply click ok
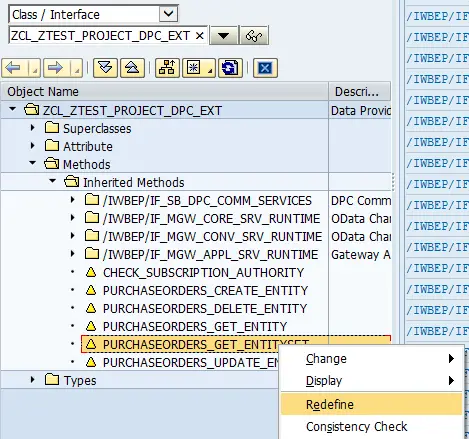
You will now be taken to tcode SE80. Within the object list on the left find the PURCHASEORDERS_GET_ENTITYSET method within Methods->Inherited Methods.
Once you have found this, right click on it and select Redefine
Within the method code that appears simply add the following ABAP select statement
SELECT *
UP TO 10 ROWS
FROM ekko
INTO CORRESPONDING FIELDS OF TABLE et_entityset.
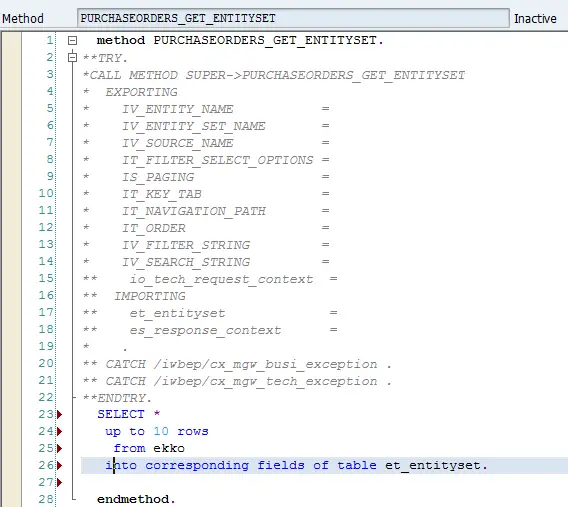
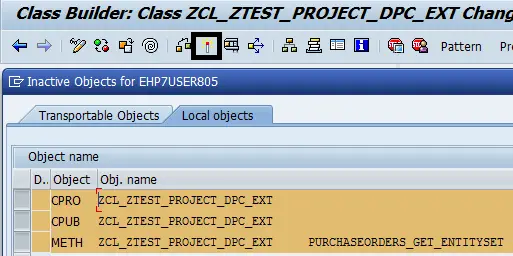
Save and Activate
Step 17 - Re-test the service
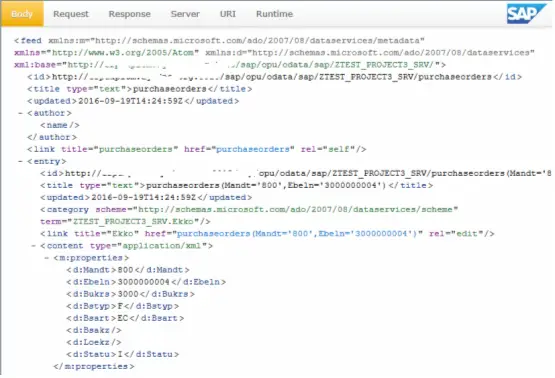
Again change the URI to "/sap/opu/odata/sap/ZTEST_PROJECT_SRV/purchaseorders?sap-ds-debug=true"
This time you should get some data returned
Step 18 - Further info
Remember I mentioned about not using all the fields from the EKKO table as some are not compatable. If you had included them all when executing the URI "/sap/opu/odata/sap/ZTEST_PROJECT_SRV/purchaseorders?sap-ds-debug=true" you would have recieved the following http error message:
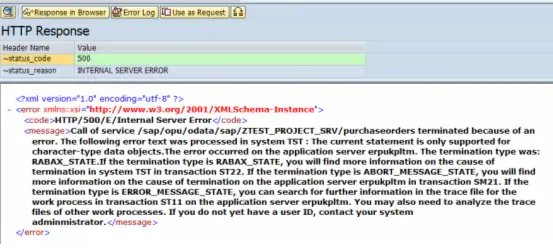
<?xml version="1.0" encoding="utf-8" ?>
- <error xmlns:xsi="http://www.w3.org/2001/XMLSchema-Instance">
  <code>HTTP/500/E/Internal Server Error
  <message>Call of service /sap/opu/odata/sap/ZTEST_PROJECT_SRV/purchaseorders terminated because of an error. The following error text was processed in system TST : The current statement is only supported for character-type data objects.The error occurred on the application server erpukpltm. The termination type was: RABAX_STATE.If the termination type is RABAX_STATE, you will find more information on the cause of termination in system TST in transaction ST22. If the termination type is ABORT_MESSAGE_STATE, you will find more information on the cause of termination on the application server ????? in transaction SM21. If the termination type is ERROR_MESSAGE_STATE, you can search for further information in the trace file for the work process in transaction ST11 on the application server ______. You may also need to analyze the trace files of other work processes. If you do not yet have a user ID, contact your system adminmistrator.
</message>
  </error>
Step 19 - Further development
The next step is to access this gateway service from your SAP Fiori App

Related Articles
SAP Netweaver Business Client
SAP Web Application Development using ITS - Example ABAP code and information
Netweaver - Information about SAP netweaver technologies
SAP GUI for HTML - running SAP on a PC that does not have the SAP client installed
Maintain web services - Use of transaction SICF to activate and maintain SAP web services
SAP Web Application Development - Example code and information on various areas of web development
SAP GUI for HTML - running SAP on a PC that does not have the SAP client installed
Internet transaction server ( ITS ) - advantages and disadvantages
ITS Flow logic - advantages and disadvantages of using ITS flow logic
Developing SAP Web Transactions - using SE80 and then published to the ITS