
SAP Fiori app setup and activation so that it can be accessed via the launchpad
<<Fiori Home
Return to Fiori Home
Fiori Launchpad Setup/installation
The First thing you need to do is ensure that you have an installed and active SAP Fiori launchpad. If this is not already setup you will need to ask
or work with your basis team to set this up. Depending on your SAP system you may need to go through patching excercise or upgrade
to a later version.
For help in this area check out the installation guides from SAP
Fiori Launchpad Installation Guide 1
Fiori Launchpad Installation Guide 2
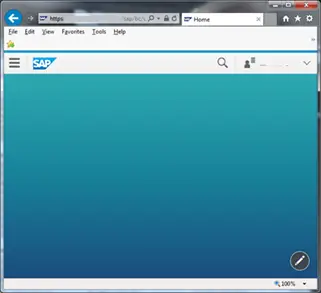
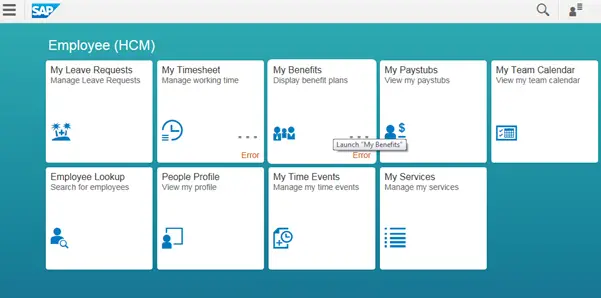
Once you launchpad has been installed and setup correctly you should be able to load it via the appropriate URL, it should look somthing like this
Install apps on the Fiori Launch pad
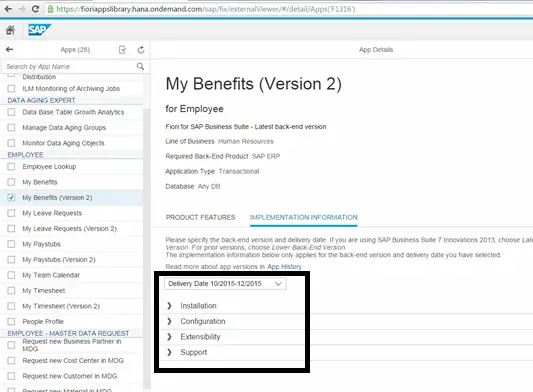
Go to the SAP Fiori apps library and select an app you want to implement
Fiori apps library.
I am going to use the My Benefits (Version 2) app for this demo which can be found by searching or going to
menu option "By Line of Business->Human Resources->My Benefits (Version 2)".
All the information you need to implement this Fiori app is contained within the Implementation information tab, assuming you already have a working SAP Fiori launch pad.
The details are broken down into different sections Installation, Configuration, Extensibility and Support
Also See video showing Setup process
� Installation Section
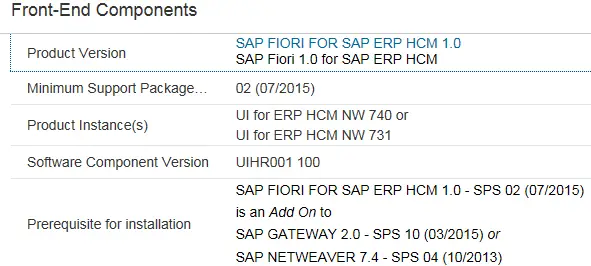
Step 1 - Front-End Components
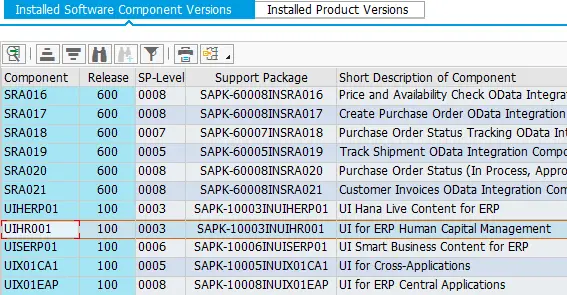
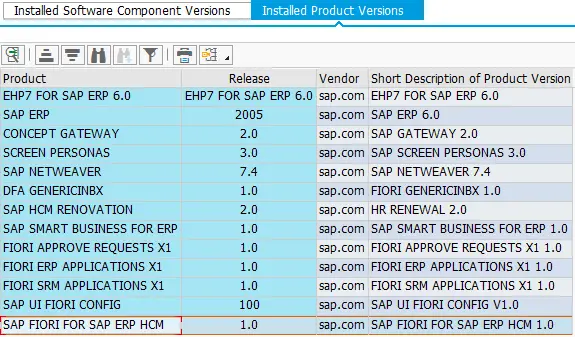
The first thing to check is that all the required front end components are present on your system.
The main one you need to check is the software component but you can also check the product version etc.
For the My Benefits app you can see that it requires SAP Fiori for SAP ERP HCM 1.0 and UIHR001 100.
To check these exist go to transaction SPAM within your SAP system, click the green tick and press the �Package level� button.
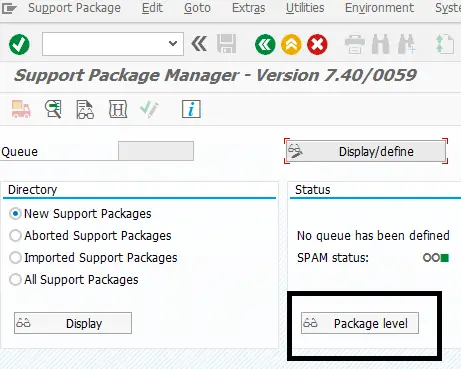
You can then view the 2 tabs to check which components are installed within you SAP system
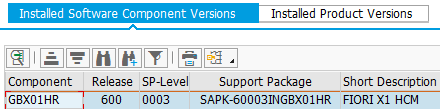
Step 2 - Back-End Components (ABAP)
The next step is to use the same information from SAP transaction SPAM to check if the required back end components already exist in your SAP system.
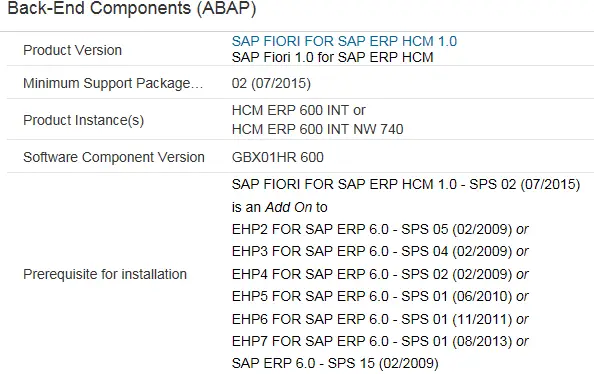
For example:
Step 3 - Check Required SAP Notes
The next section describes any SAP notes that may be required. As you can see this app currently requires
SAP OSS note 2103156 to be installed. Use your normal Note installation procedures to check and implement any required notes.
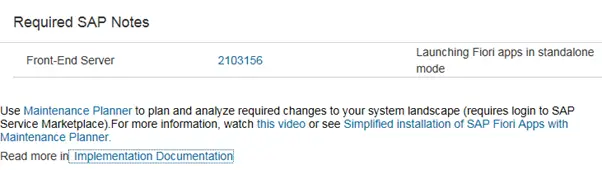
One way to check quickly is to use transaction SNOTE, here you can see if it has already been downloaded and/or implemented
or if it isn�t valid for your system. If it cannot be implemented then it is not valid for your system and would generally
mean that your system already contains the changes as they have been implemented via a support package.

� Configuration Section
Step 4 - Activate the SAPUI5 Application
The configuration section lists app specific data required to configure an app.
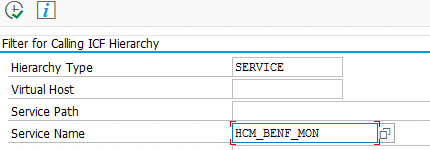
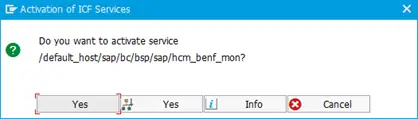
The first item defines the actual SAP backend service/application which needs to be activated via transaction SICF.

Within the initial screen of SICF enter the technical name into the Service name (I.e. HCM_BENF_MON) field and press execute.
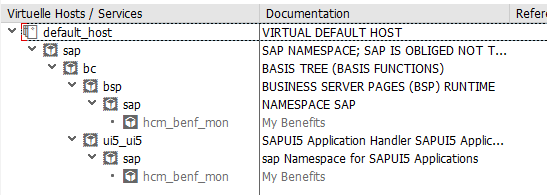
You will then be presented with the appropriate services which will be greyed out if inactive.
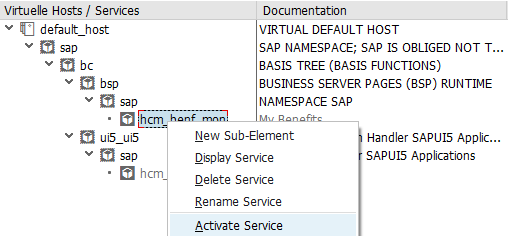
Simply right click on each of the service entries and select activate
Step 5 - Configure the SAP Fiori Launchpad
This next section now shows you how to give a user access to this app within the Fiori launch pad.
This will include all the apps that are contained within the role catalogue.
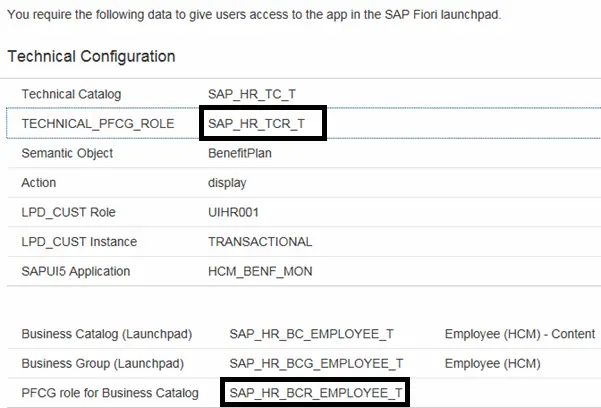
To do this you basically just need to add your user name to Z versions of the roles listed (i.e. SAP_HR_TCR_T and SAP_HR_BCR_EMPLOYEE_T) via transaction PFCG.
If this has not already been done copy these roles via the copy button to a Z version such as Z_ SAP_HR_TCR_T and Z_ SAP_HR_BCR_EMPLOYEE_T.
Then add your username to these rather than the standard SAP ones.
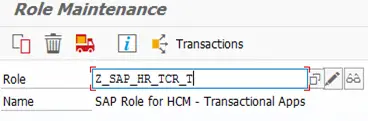
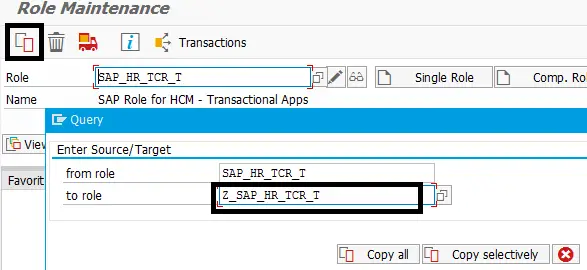
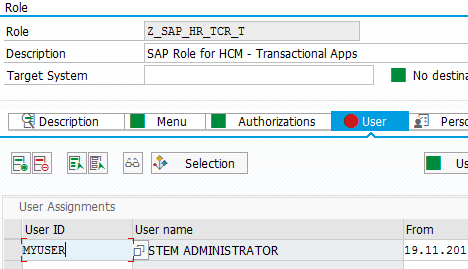
Execute t-code PFCG and enter the first role Z_SAP_HR_TCR_T and press change
Use the copy button to create a Z version if this has not already been done
Once within change, select the User tab and enter your user id
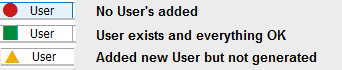
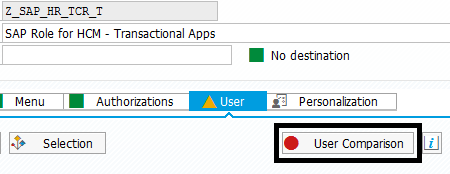
Now press SAVE. You will notice that the User comparison button and the User tab status will no longer be green. Note that the User tab may not have been green if this is the first user to be added.
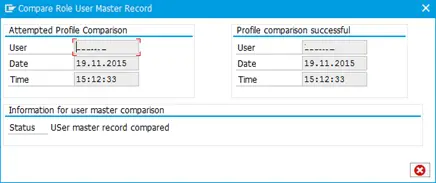
To fix this click the User Comparison button
Then click "Complete comparison"
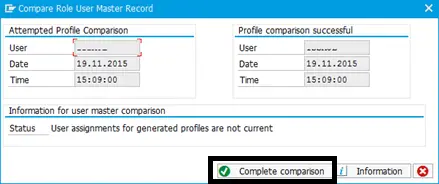
and then cancel once it is done to close the popup screen
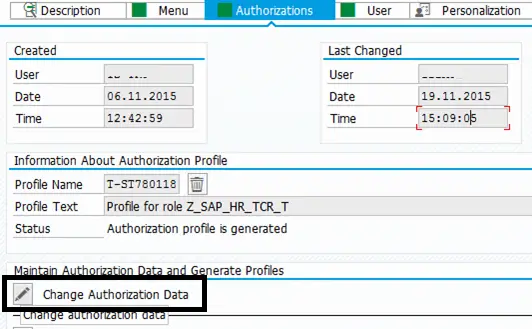
Everything should now be green. You may still want to re-generate the role profile just to make sure everything is ok.
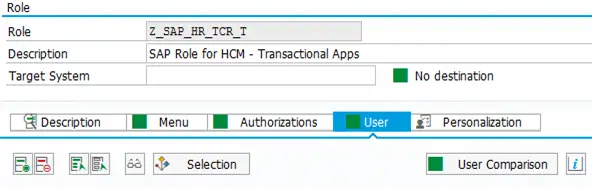
This can be done by going to the Authorizations tab and clicking on the "Change Authorization Data" button
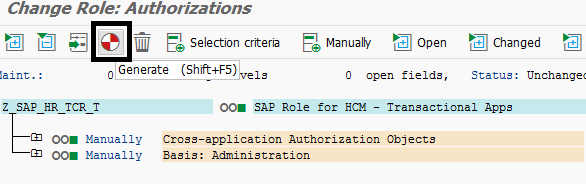
On the following screen simply click the Generate icon and the role profile will be fully generated and ready to go
For this app repeat this process for SAP_HR_BCR_EMPLOYEE_T via SAP transaction code PFCG
Step 6 - Check Launchpad
If you now return to your Fiori Launchpad you will notice that it will now include a number of apps which
are available via the catalogue associated with the roles you have just set-up. Notice My Benefits may have
an error as everything may not be setup yet including the OData service associated with this app.
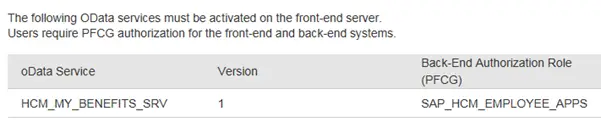
Step 7 - OData Services
The last step is to implement any OData services associated with your app.
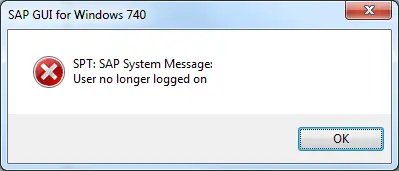
This is done via SAP transaction /N/IWFND/MAINT_SERVICE. Note the /N at the front, I found that if I just entered /IWFND/MAINT_SERVICE I got an error message saying User no longer logged on, adding the /N fixed this issue.
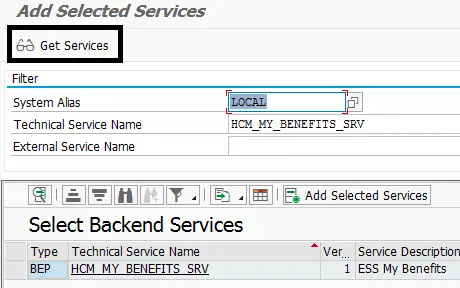
After executing /N/IWFND/MAINT_SERVICE click on "Add Service"
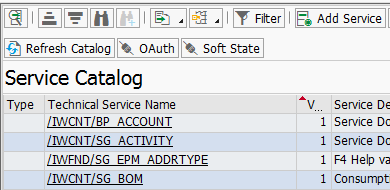
Enter the service name (i.e. HCM_MY_BENEFITS_SRV) into the "Technical Service Name" along with the System Alias which can be entered via the drop down F4 help. Now press the "Get Services" button
Click on the selected backend service found (i.e. HCM_MY_BENEFITS_SRV), enter a new Z name such as ZHCM_MY_BENEFITS_SRV along with a package assignment and press the green tick to save this service.
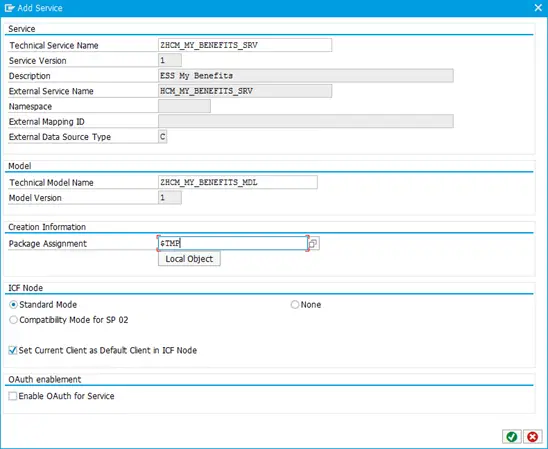
The service will then be created

Also notice that the OData service has a PFCG role associate with it
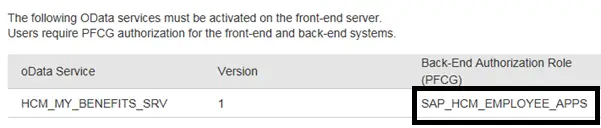
You need to add your username to this role via transaction PFCG as you did with the SAP_HR_TCR_T and SAP_HR_BCR_EMPLOYEE_T role. Including creating a Z version first i.e. Z_SAP_HCM_EMPLOYEE_APPS
Step 8 - Re-Check Launchpad
Now if you re-run the Fiori launchpad you will see that the My Benefits app will still exist but without the error.
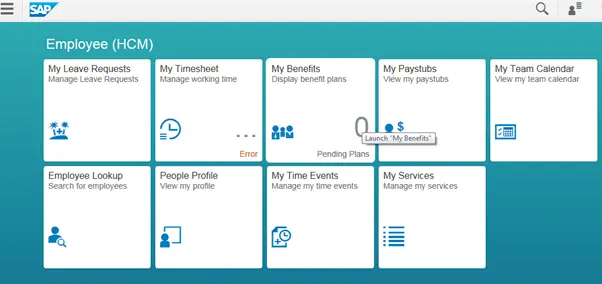
At this point if you can click on any of the other apps, some will work as they only require roles that have already been setup and some will give you an error. If you follow the implementation steps above for each app they should all be activate and work ok.
Step 9 - See video of setup
Also check out video of setup process
<<Fiori Home
Return to Fiori Home
Related Articles
FIORI introduction and helpful links to get you started on the road to creating SAPUI5 apps
FIORI introduction and helpful links to get you started on the road to creating SAPUI5 apps
Install local SAP Web IDE development environment onto your own PC
SAP Web IDE (formally River RDE) is a Browser based development environment
SAP Web IDE (formally River RDE) is a Browser based development environment
Create Web IDE Fiori App from EDMX Mock data file without connection to backend SAP system