
ABAP and SE80 to consume a Web Service - Example to demonstrate simple creation process
The below steps will take you step by step and show you how to first consume any webservice WSDL using an SAP
enterprise service and then call it using an ABAP program.
For this example we will use the currency converter available via WSDL link http://www.webservicex.com/currencyconvertor.asmx?WSDL
It is supposed to take 2 currency codes (i.e. GBP, AUD, USD) and returns the conversion value. Im not actually sure
it still returns a valid number but it can still be used to demonstrate the process of consuming a web service within
SAP. Once you have followed the steps and you want to try a webservice that works fully you could use http://www.dataaccess.com/webservicesserver/numberconversion.wso?WSDL which
converts a number 1 to 9 into words or dollar values(i.e. "1" would return "one" or "1 dollar").
If you are on a very old version of SAP you might want to check out this guide to creating an ABAP proxy which was
the original version of the enterprise service consumer.
Step 1 - Enterprise service consumer creation wizard via SE80
Execute transaction SE80 and within the the 'edit object' popup screen select Enhance Options->Enterprise Services tab->Proxy object->Use internal key and then press create.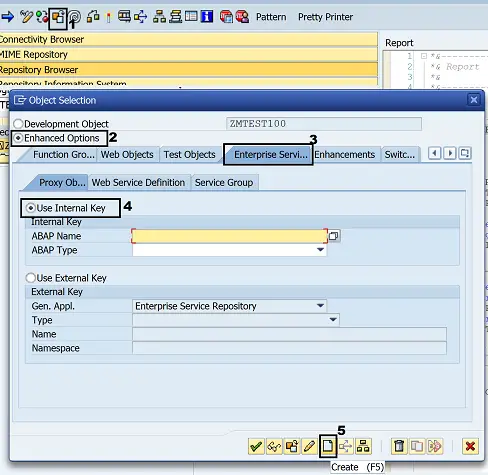
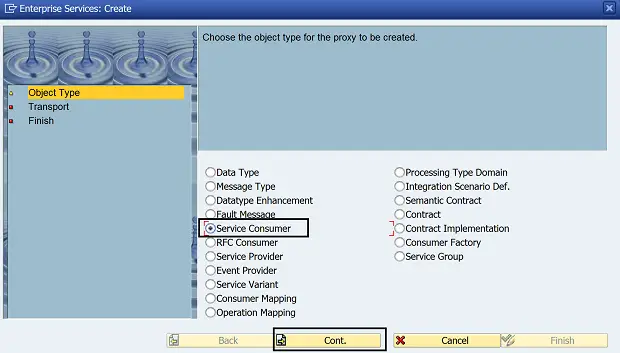
To create an enterprise service that "consumes" a web service choose Service Consumer. This seems obvious but this caused me a bit of a headache initially as for some reason I chose Service provider. Quick tip: If you have a service which you think is a Service consumer but you don't have the option to create an logical port via SOAMANAGER check its not a Service Provider.
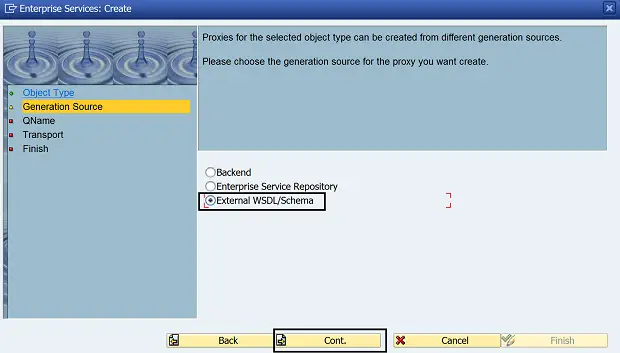
Now choose External WSDL/Schema and click continue
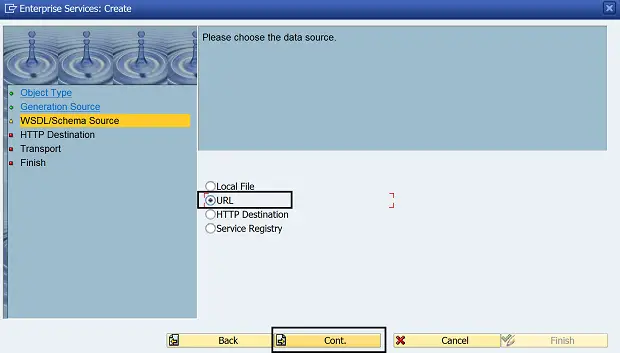
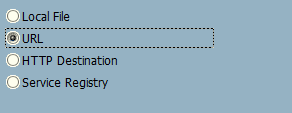
Select URL and click continue
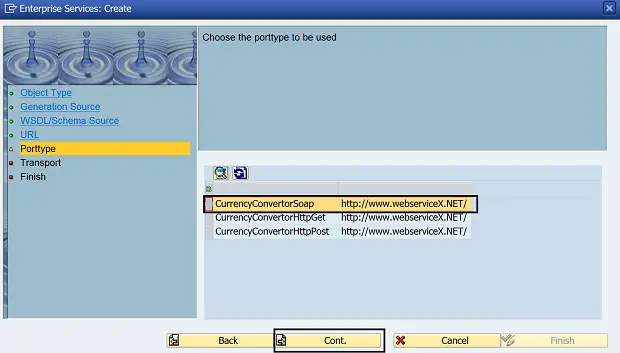
Highlight the soap entry(top) and click continue
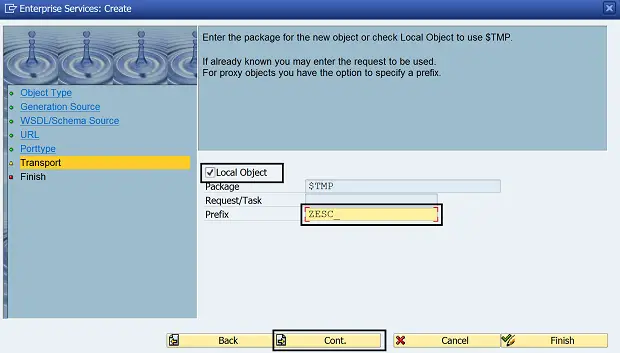
Now enter the package details or just click the local object checkbox. Also enter a prefix of something like 'ZESC_', which I use to stand for Enterprise Service Consumer. When the auto generation occurs SAP only has a finite size for the name of the proxy, this prefix helps ensure it does not encounter any duplication problems. Now press Continue.
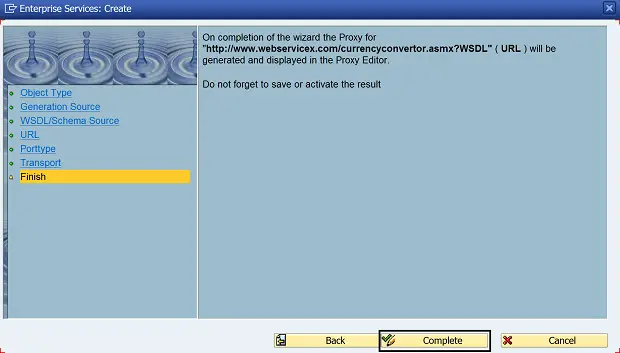
and on the final screen press complete
Step 2 - Activate the created enterprise service
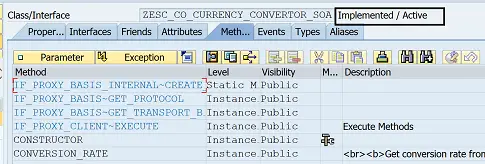
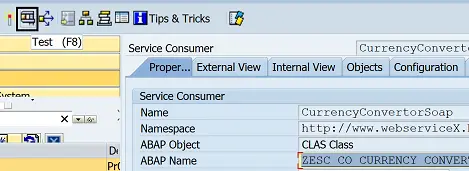
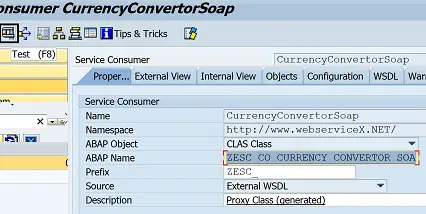
You should then be returned to the SE80 main screen displaying the new class based service consumer object. You simply need to active it using the activate option.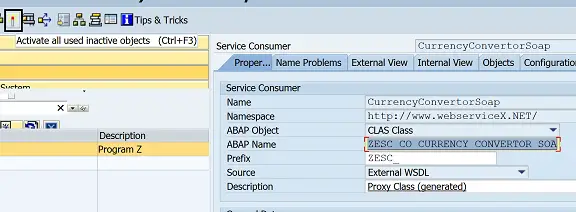
You could also double click on the class within the ABAP Name field and ensure it is also active
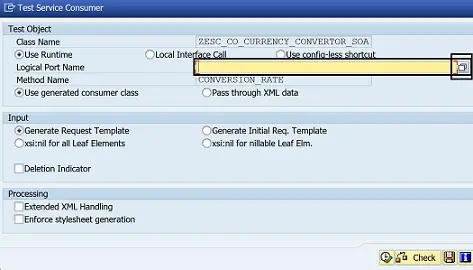
Now return to the previous screen and test the service by pressing the test button
But you will soon realise the service is not ready to test yet as you haven't created a logical port yet. See for yourself and use the search help / F4 to confirm there aren't any available to select.
Step 3 - Create logical port for enterprise service consumer via SOAMANAGER
To create a logical port first execute transaction SOAMANAGER. This used to be done via tcode LPCONFIG but this is niw obsolete.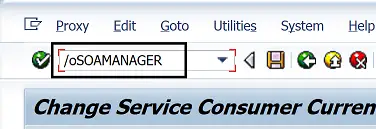
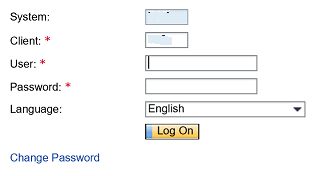
SOAMANAGER will open up in a web browser window and access for your login details. These are the same ones you log into the backend SAP system
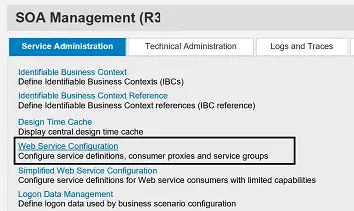
Select the Web Service Configuration option
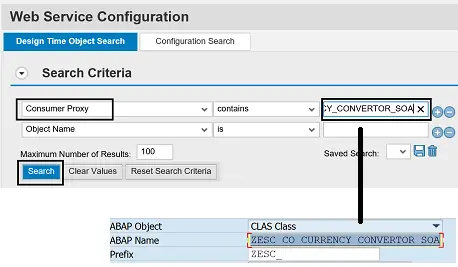
now search for your service consumer object by selecting "Consumer Proxy" and and entering the ABAP name of your service (found on the earlier SE80 screen).
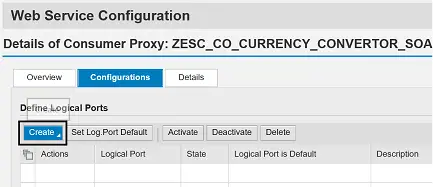
your created object should be returned in the search results, simply click on this
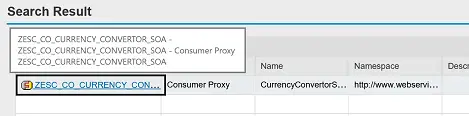
and on the next screen select create->WSDL Based Configuration
Step 4 - Enter logical port details
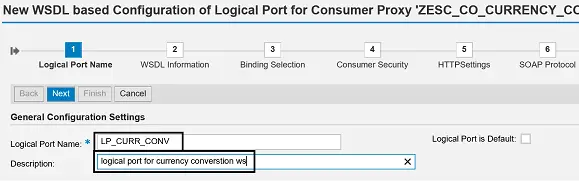
Now its time to enter the details for the logical port. On screen one enter a name for your logical port i.e. LP_CURR_CONV followed by a description of your choice. Then press the next button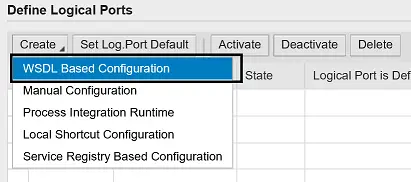
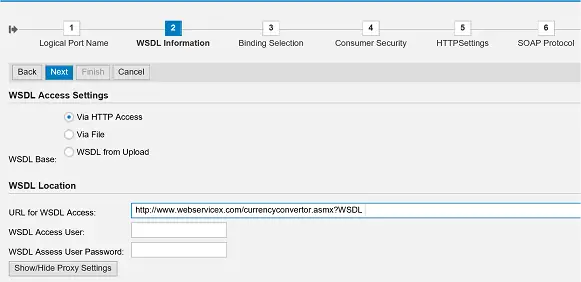
On screen two enter the WSDL link to your web service i.e. http://www.webservicex.com/currencyconvertor.asmx?WSDL and press the next button. Note if your web service required a user name and password you would enter it here.
leave screen three as default and press next
again leave screen four as default and press next
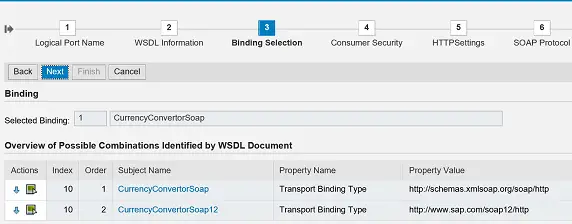
familiarize yourself with the auto entered settings on screen five but again you should be able to leave these as default and simply press next
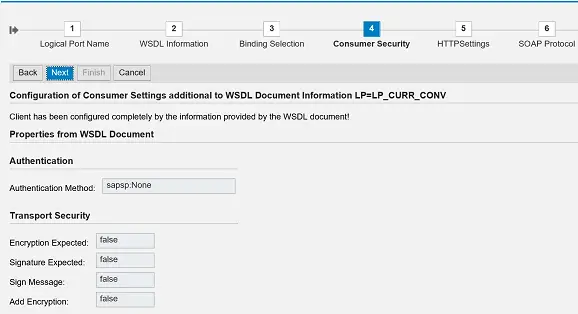
on screen six simple press next
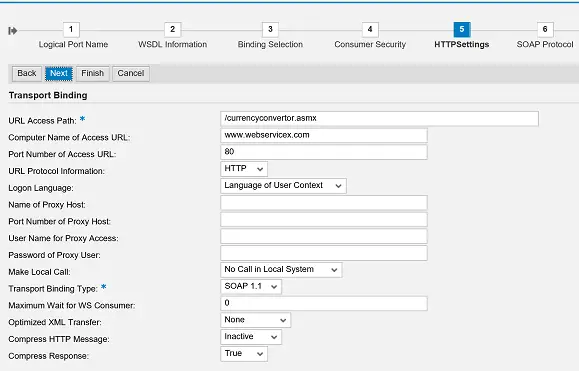
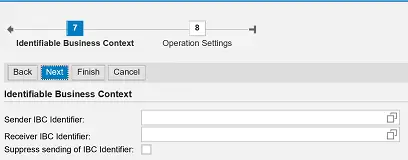
and again have a look at the options on screen 7 and press next
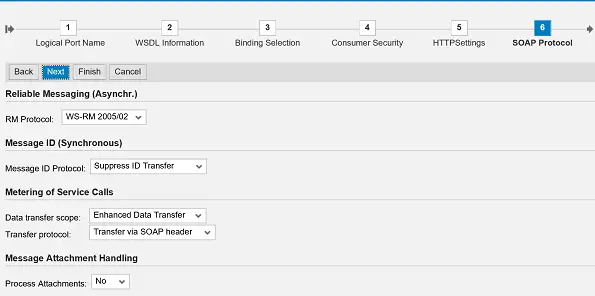
finally on screen 8 press finish
Step 5 - Test your enterprise service consumer again using the logical port
Now return to se80 and re-test the service consumer using the test button.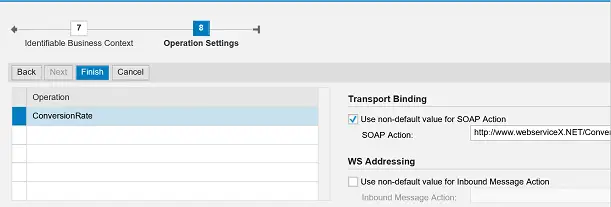
This time you should be able to select the logical port name that yiu have just selected
Press the execute button

You will now be presented with the XML to call the web service which you can modify. You can do this by uploading a file but we will simply use the XML editor. To do this click the XML editor icon.
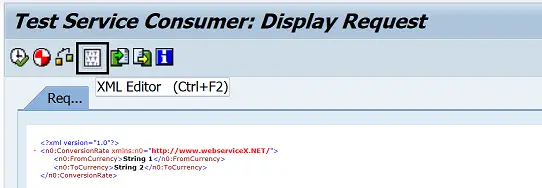
You will now be able to edit the XML request code. So enter two currency code such as AUD and GBP. Then press the execute button
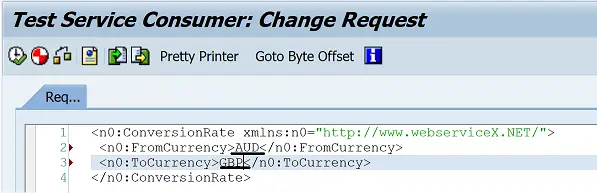
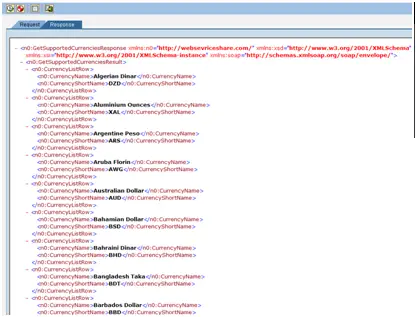
You will then see the result of the call to the webservice on the response tab. Please note im not sure the response value of the web service is correct at the moment but it has at least called the webservice and you have recieved the response sent back from the web service.
You can actually install SOAPUI on your PC if you want to test the webservice outside of SAP to confirm the response is the same. Also check out http://www.soapclient.com/?topic=soaptestl which seems to let you check a web service WSDL from their web page.
Step 6 - Call this service consumer / web service from your ABAP code
This is quite easy once you knowStep 7 - Try this webservice
Here is a new web service that I have found which has one input and 2 operations. You enter a number 1 to 9 and one operation converst the number to a word(2 = two) and the other converts it to a dollar value (2 = 2 dollars).this web service can be found here http://www.dataaccess.com/webservicesserver/numberconversion.wso?WSDL
Step 2 - Create ABAP proxy
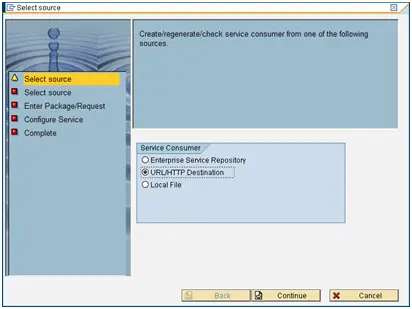
You should now be presented with the first screen of the ABAP proxy generation wizard where you need to enter URL/HTTP Destination and press continue. If your screen doesn't look quite the same as these images see end of this article for updated screen shots.
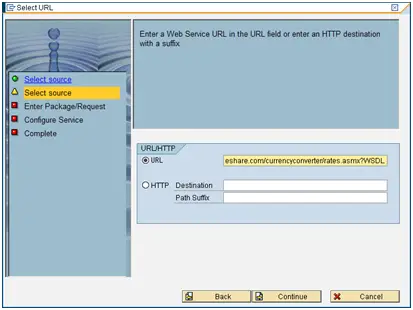
Next you need to select URL, enter the url of your webservice WSDL and press continue. For this example the WSDL will be http://www.webservicex.com/currencyconvertor.asmx?WSDL
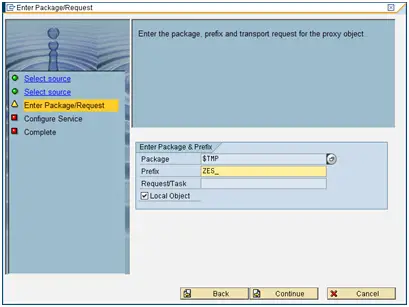
Now enter the package details or just click the local object checkbox and enter a prefix of 'ZES_'. When the auto generation occurs SAP only has a finite number of of characters for the name of the proxy, this prefix helps ensure it does not encounter any duplication problems when it trims dowm names to fit in the field available. Now press Continue and on the next screen press Complete.
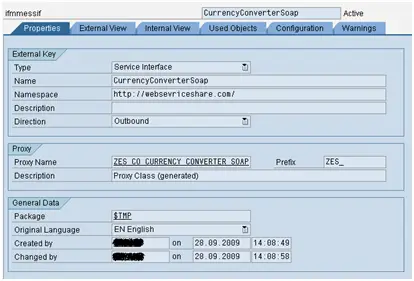
Your ABAP proxy should now generate and you should be presented with the following screen. Save and activate it!
Step 3 - Create a logical port
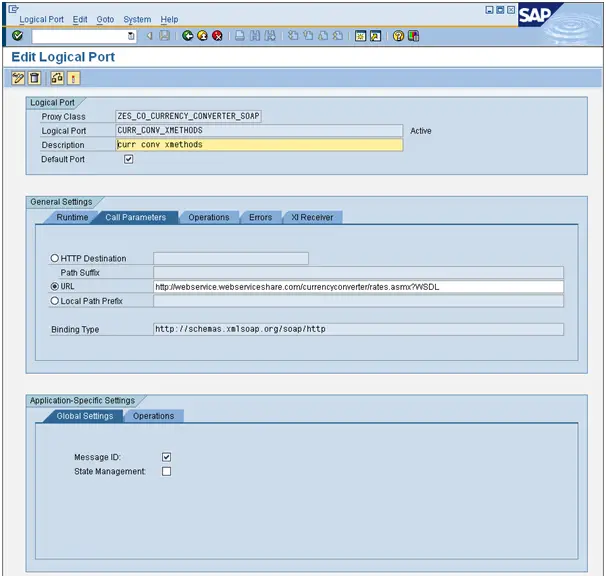
Execute transaction LPCONFIG and within Proxy class enter the proxy you just created ZES_CO_CURRENCY_CONVERTER_SOAP in SE80. Then with the Logical Port enter an appropriate name such as CURR_CONV_XMETHODS. Tick the Default Port checkbox and press create.

Step 4 - Setup Call parameters
Within the 'Call Parameters' tab select URL and enter the url of the WSDL again (http://www.webservicex.com/currencyconvertor.asmx?WSDL).
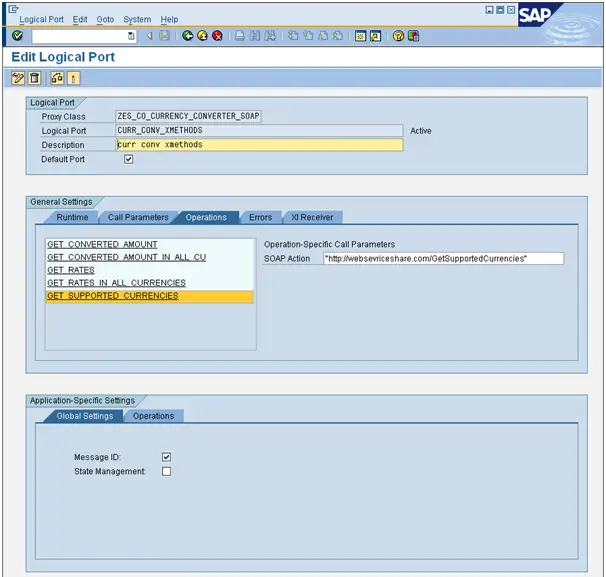
Step 5 - Setup Operations
Right this is where it gets a little messy as now we need to add the reference from the actual WSDL code into each operation. Basiaclly within the WSDL there is a section which details each operation and specifies a soapAction url. We simply need to find this soapAction url and enter it into the operations tab for the appropriate operation. I am just going to set up the 'GET_SUPPORTED_CURRENCIES' operation but feel setup the others at any point.
To do this select the GET_SUPPORTED_CURRENCIES operation and enter the SOAP Action as "http://websevriceshare.com/GetSupportedCurrencies". This was found in the following section of the WSDL:
	<wsdl:operation name="GetSupportedCurrencies">
<soap:operation soapAction="http://websevriceshare.com/GetSupportedCurrencies"
                                                               style="document"/>
Step 6 - Test your webservice ABAP proxy
Make sure you save and activate the logical port and return to your ABAP proxy with SE80. Hit the test button and enter CURR_CONV_XMETHODS as your logical port name
and GET_SUPPORTED_CURRENCIES as the method name (action). Now press execute!

Step 7 - Enter input details
As this method/action of the webservice does not require an input values simply press the execute button again.
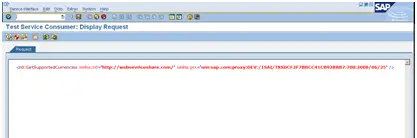
Step 8 - Enter input details
The webservice results should now be displayed, a list of all the currency codes supported by the webservice.
Step 9 - UPDATE!!!
In later versions of SAP the SE80 screen looks different and a Client proxy is now refered to as a Proxy Object, still
within the Enterprise Services tab. You can now see the internal key details as well as the External key details
from here.
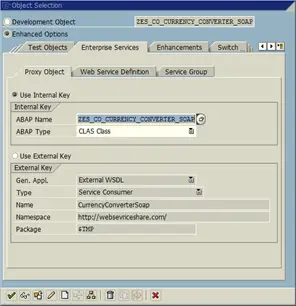
Creation is still via the create button at the bottom of this screen but you choose slightly different options.
For example you choose "External WSDL/Schema from the first menu.

and then URL from the next menu.
 Click here for Main Web Service Menu
Click here to Add transition layers to your VC application so that each form is on a separate page.
Click here for Main Web Service Menu
Click here to Add transition layers to your VC application so that each form is on a separate page.
Related Articles
ABAP and SE80 to provide a Web Service to the outside world
SAP Visual composer application - modeling tool for rapid application development
Visual composer example - Very simple to implement
Visual composer application with layers to allow each input/output form to be on a separate screen
Consuming a temperature conversion webserve with an SAP VC application
Consuming a webserve with an SAP VC application
SAP web services - Consuming a webservice and surfacing them in SAP for others to use
ABAP and SE80 to consume a Web Service - Example to demonstrate simple creation process
