
Adding inbound and outbound plugs to your ABAP WebDynpro
Below are the steps for adding inbound and outbound plugs to your ABAP WebDynpro view.
Step 1
Create new ABAP Web Dynpro component!
Step 2
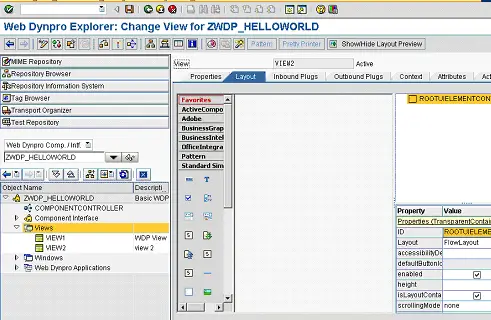
Create two views within you WDp (VIEW1 & VIEW2)
Step 3
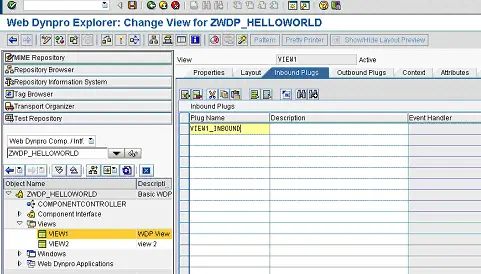
Select the Inbound Plugs tab of the first view and enter a name for your inbound plug (VIEW1_INBOUND)
Step 4
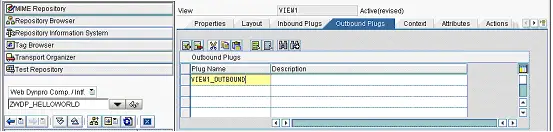
Now select the Outbound Plugs tab of the first view and enter a name for your inbound plug (VIEW1_OUTBOUND)
Step 5
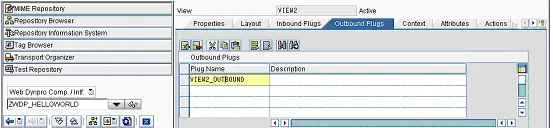
Now do the same for the second view and enter an inbound and outbound plug name

Step 6
Save and active you WDp! Now go to the Window section and embed your views into the window.
Step 7
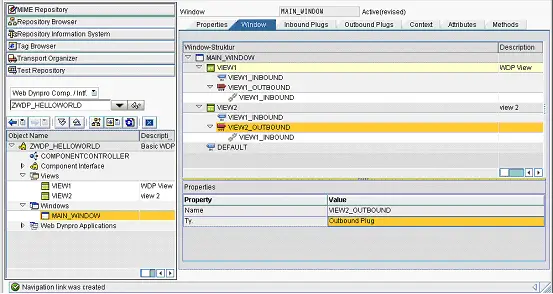
You should now see your two views and their corresponding plugs within the window section

Step 8
You now need to join your plugs together. To do this simply drag the outboundplug onto the correspoonding inbound plug. i.e. Drag VIEW1_OUTBOUND on VIEW2_INBOUND
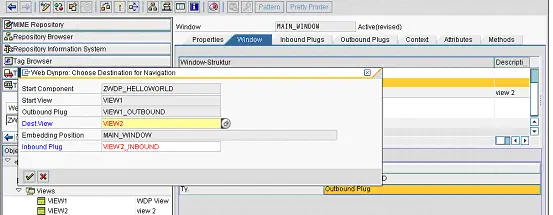 Now do the same from view2 to view1 i.e. Drag VIEW2_OUTBOUND on VIEW1_INBOUND
Step 9
You should now have a chain icon on each outbout plug
Step 10
The next stage is to trigger these inbound and outbound plugs from some kind of user interaction. I will now show you how to trigger these plugs from a UI button on each page!
Trigger inbound and outbound plugs from a UI button
Related Articles
Displaying a web dynpro field with F1 dictionary help
Adding a UI element to a view of and ABAP Webdynpro
Make WebDynpro view part of the WebDynpro window
My First ABAP WebDynpro - simple WebDynpro to display 'Hello world'
Displaying data with ABAP WebDynpro table
ABAP Web Dynpro layout development and how it looks in your browser
Adding a IMAGE UI element to an ABAP Web Dynpro view
Triggering ABAP WebDynpro inbound and outbound plugs